Isolating Organisms
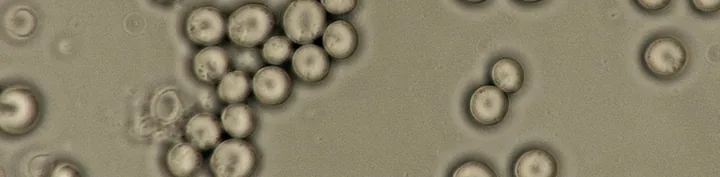
WIP
This page is a work in progress. The process is settled, but many photos are still to be collected; each missing one is marked with a Photo to come box. Everything here is experimental home practice: read the disclaimer first.
There are plenty of resources explaining how to isolate yeast and bacteria. This page is not another general guide: it records the procedure I follow, step by step, and the tips I have picked up at each stage.
I learnt pretty much everything I know about isolating bugs from Sui Generis Brewing. A big thank you to Dr Bryan Heit, who runs the site: over the years he has been incredibly generous with his time, answering all my silly questions and helping me a lot. A super nice guy, and extremely knowledgeable.
Why I isolate bugs
- Dregs make unbalanced cultures. Growing up bottle dregs usually gives a mixed culture dominated by strong acid producers and resistant bacteria. Building a mixed fermentation from individual strains gives me some control over what ends up in the beer, and in what proportion.
- Cost. Buying three to five different commercial bugs for one batch is just too expensive.
- Choice. I get to pick the bugs from bottles I really like.
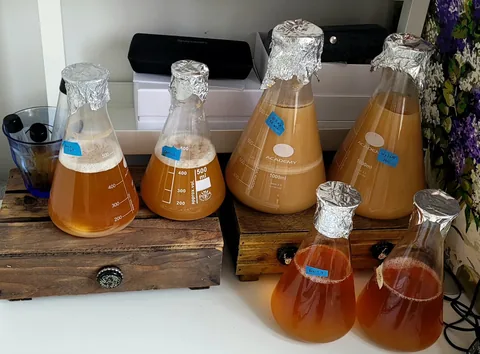 The many yeasts a single split batch may need: too expensive to buy
The flow
Four phases, left to right; each phase runs top to bottom. Dashed boxes are checks. When a check fails I go back: to step 3 or 4 when the plates are crowded or the target is missing, to step 6 when the confirmation plates are mixed, and to step 8 when the full-slide check is not clean. Documentation runs alongside every step (see Documentation); my working set-up is under How I work.
%%{init: {"flowchart": {"nodeSpacing": 14, "rankSpacing": 22, "padding": 6}, "themeVariables": {"fontSize": "13px"}}}%%
flowchart LR
    subgraph A ["A · Source"]
        direction TB
        S1["1 · Bottle research"] --> S2["2 · Dregs under<br/>the microscope"] --> S3["3 · Revive and enrich"]
    end
    subgraph B ["B · Isolate"]
        direction TB
        S4["4 · Plate at<br/>several dilutions"] --> S5["5 · Observe plates"] --> S6["6 · Pick 5 to 10<br/>lone colonies"] --> S7["7 · Check each pick"]
        S5 -. "crowded" .-> S4
    end
    subgraph C ["C · Confirm"]
        direction TB
        S8["8 · Confirmation<br/>plating, 2 rounds"] --> S9["9 · 10 to 20 colonies<br/>into clear wort"] --> S10["10 · Full slide<br/>at 1000x"]
        S10 -. "not clean" .-> S8
    end
    subgraph D ["D · Bank and test"]
        direction TB
        S11["11 · Bank on slants"] --> S12["12 · Mini-beers"] --> S13["13 · Assess"]
        S11 -.-> S14["14 · Using the slants"]
    end
    A --> B --> C --> D
    classDef check stroke-dasharray: 4 3
    class S2,S5,S7,S10 check
How long it takes
The theoretical duration of a run, in weeks from opening the bottle, with nothing going wrong. Phase B runs twice before confirmation, as good practice. Every failed check adds another round of about two weeks. I have clean tubes at about week 9, banked slants at about week 11, and a first verdict on a mini-beer from week 12, though the mini-beers can run to week 18 or beyond. In reality, it tends to take longer for me as some of the tasks extend as I am not always available to move forward the minute a stage completes.
%%{init: {"gantt": {"barHeight": 18, "barGap": 3, "topPadding": 20, "gridLineStartPadding": 12, "leftPadding": 80, "fontSize": 12, "sectionFontSize": 12, "numberSectionStyles": 3, "topAxis": true}, "themeVariables": {"fontSize": "12px"}}}%%
gantt
    %% wb:week-labels
    dateFormat YYYY-MM-DD
    axisFormat %-W
    tickInterval 1week
    weekday tuesday
    todayMarker off
    section A · Source
    1–3 · Dregs, revive         :a1, 2019-01-01, 7d
    section B · Round 1
    4–5 · Dilution plates grow  :b1, after a1, 14d
    6–7 · Pick and check        :milestone, b2, after b1, 0d
    section B · Round 2
    8 · Plates from picks           :b3, after b2, 14d
    6–7 · Pick and check        :milestone, b4, after b3, 0d
    section C · Confirm
    8 · Confirmation plates     :c1, after b4, 14d
    9 · Clear-wort tubes        :c2, after c1, 14d
    10 · Full slide             :milestone, c3, after c2, 0d
    section D · Bank <br/>and test
    11 · Slants grow            :d1, after c3, 14d
    12 · Step up                :d2, after c3, 7d
    13 · Mini-beers, 2 weeks    :d3, after d2, 14d
    13 · … up to 8 weeks        :done, d4, after d3, 42d
How I work
I won't explain aseptic technique here: much better explanations than I could give can be found on many sites. This is what I do. I work at a normal desk that I try to keep clean, very close to an alcohol lamp. I close the windows and door to avoid draughts, and I often wear a mask over my mouth and nose to minimise air flows.
Everything I sterilise (wort, water, agar, tubes and tools) goes in the pressure cooker for 15 min; the one exception is plate agar, which sometimes gets a 15 min boil on the hob instead (see Preparing plates). Everything incubates at ambient temperature, ~21 °C, drifting by 1 to 2 °C between day and night.
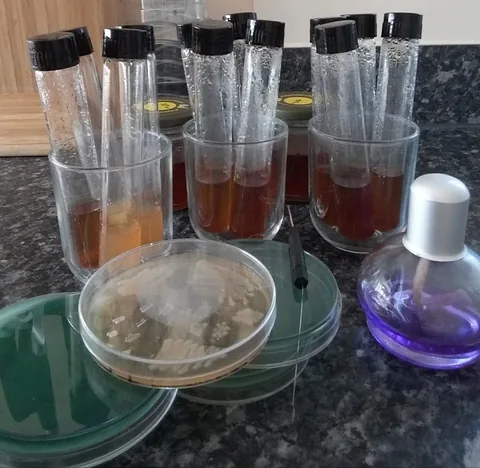 My bench: bromocresol green plates, test tubes ready for plating, inoculation loop and alcohol lamp
1 · Bottle selection and research
I start from a beer I like, or a bottle containing organisms from breweries I follow. I try to find out as much as possible about the beer, the process and the organisms. Some of it may be on the label, but searching online and contacting the brewer sometimes gives valuable information that helps shape the process. Knowing roughly what is in the bottle (which yeasts, whether there are bacteria, whether it was bottled with a separate yeast) tells me what to look for on the plates and what to expect under the microscope.
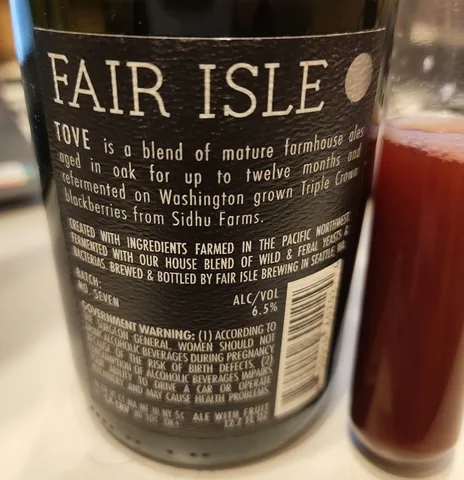 Fair Isle Tove: blended farmhouse ales. A fantastic, five-star beer, well balanced with restrained acidity. "Wild and feral yeasts and bacteria" I must have
Tip
I reach out to the brewer. It is surprising how helpful and willing to share information brewers can be, and most will say whether the bottle carries the house culture or a commercial strain or blend, and whether a bottling yeast was used. Unless I am told categorically otherwise, I assume the beer has some bottling yeast, and I always run a mini-beer to check whether the Saccharomyces in the bottle contributes any character. If it does not, I discard it, on the assumption it is not something I want in primary fermentation.
Tip
I take the age of the bottle into account. In my experience, young bottles give better chances of recovering live Saccharomyces or Lactobacillus, while Brettanomyces is often easier to get from older bottles. As I am primarily after Brett, I work with gueuze and mixed-fermentation beers, which are all or mostly bottle conditioned. Stating the obvious: nothing grows from a pasteurised beer.
2 · Dregs under the microscope
After pouring the beer, I tip some of the dregs into one or two 50 mL test tubes containing ~20 mL of sterile wort. A first look under the microscope tells me what kinds of cells are there, roughly in what proportion, and how healthy they look.
Photos to come
Full dregs; what stressed and damaged cells look like; proteins vs bacteria.
Tip
I tip the sterile wort over the dregs and swirl gently before tipping a small portion back into one of the test tubes; that is the tube I sample for the microscope. Diluting the dregs, and avoiding the hard sediment often found at the bottom of the bottle, makes the inspection easier.
Tip
I treat this view as a list of suspects, not an identification. I note what I see (cell shapes and sizes, bacteria as rods or cocci, singles, pairs or chains) so the plates can be read against it later. This step also shows the health of the cells.
Tip
Most Brett cells look quite different from Saccharomyces: they are often elongated, and much smaller. Some Brett, however, appear as big round cells, much like Saccharomyces. Bacteria and yeast cannot be confused, given the massive difference in size and shape, but bottle debris such as beer stone and proteins can easily pass for bacteria; well defined shapes are what set bacteria apart. Pediococcus are round to egg-shaped cocci that stick together in pairs or clumps. Lactobacillus are rod-shaped, and may be found singly, in pairs or in chains. I use 1000x for a better chance of finding bacteria.
3 · Enrichment and selective media
This step depends heavily on what I want to target in the mix, and on what is available to me as a homebrewer (which isn't much). The idea is to grow the dregs, before plating, in a medium that favours what I am after. I never plate straight from the dregs: I revitalise them in sterile ~1.020 wort first. A heavily hopped wort slows hop-sensitive bacteria while the yeast recovers, but I am prepared to come across hop-tolerant bacteria, which need a different approach.
My experience with home-made selective media has not been great. No matter how much I begged, and promised I would wear gloves and not use a kitchen spoon to handle highly toxic chemicals, labs would not sell them to me. In retrospect I am glad I did not get hold of some of the products I was trying to source: I have come to realise I am not trained or equipped to handle them, and with a bit of extra effort I have managed without them.
Photo to come
Enrichment starter: dregs revitalising in sterile (hopped) wort.
Tip
Selective and differential media I have tried, with inconsistent success: bromocresol green, a pH indicator that separates colony types by colour; chloramphenicol, to remove bacteria; copper sulphate, to kill Saccharomyces (difficult to dose, and it killed my Brett too when I used it).
Selective agents
Antibiotics, cycloheximide and other selective agents are toxic. Unless you have adequate training, I recommend working without them.
Preparing plates
Plates are needed from step 4 onwards. I use disposable plastic Petri dishes with vents. For about five plates I use:
| Ingredient | Amount |
|---|---|
| Water | 120 mL |
| Agar | 3.0 g |
| DME | 3.6 g |
| Hops (optional) | 1 to 2 pellets in a tea bag |
For standard plates I mix everything and either pressure-cook it for 15 min or boil it for 15 min on the hob.
Depending on where I am in the process, I sometimes want clear plates. By "clear" I mean made from wort that has been pressure-cooked and decanted off the coagulated proteins, so the agar has no bits floating in it (the same goes for clear wort in tubes, steps 9 and 11). In that case I make the wort without the agar and boil it for a few minutes on the hob, to get some alpha acids in if I have added hops. I then pressure-cook it for ~10 min to coagulate the proteins, and cold-crash it. I transfer it very gently to a separate flask, leaving the sediment behind, add the agar, and either boil it for 15 min on the hob or pressure-cook it for 15 min, if there is more equipment to sterilise.
This is time-consuming and clear plates are not essential, so I typically only make them when it lets me catch up on sterilising other things at the same time.
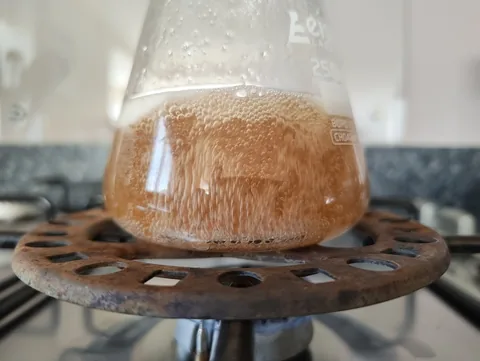 Agar boiling in an Erlenmeyer flask, for plating
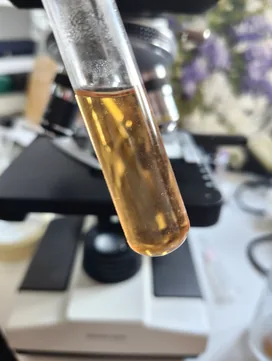 Clear wort: no protein sediment
Photo to come
Pouring plates.
Tip
I prefer Erlenmeyer flasks, to minimise the chance of mould getting in, but it can be hard to avoid boil-overs when boiling the agar. I get round this by using an oversized flask, and I add ~10 to 20 mL of extra water to make up for evaporation.
Tip
I wash and re-use my disposable plates unless they are damaged: a soft brush and dish soap, then stored dry. Before pouring, I swirl some rubbing alcohol in each plate so that every surface is coated, and I make sure it has fully evaporated before using the plates. (Once I did not wait and a plate briefly caught fire; it really startled me, and I knocked it over and made a mess.)
Tip
When pouring the agar I don't remove the lid completely: I slide it aside just enough to fit the lip of the flask in, to minimise the chance of mould getting in. Mould is, more often than not, what ruins a plate.
Tip
I only start pouring when the flask is comfortable to the touch. I stack the plates as I make them and, once all are ready, cover the stack with a kitchen towel or anything else that gives some thermal insulation. This reduces the condensation on the lids. While they wait for inoculation, I store the plates upside down.
4 · Plating at several dilutions
I plate the enriched culture at three or more dilution levels. The bugs grow at different rates, and the ones I am usually after are the slowest, so bacteria (and sometimes fast-growing mould) can take over a crowded plate. The right dilution gives well separated cells, with still a few colonies of what I am after.
Photo to come
The dilution series: tubes and the matching set of labelled plates.
Tip
I don't use a formal dilution method. I take a test tube with ~1 mL or less of sterile distilled water and add one or two loops of the enriched culture. I shake it very well, then look at one or two loops of the diluted sample under the microscope. The key to judging the dilution is to keep in mind how tiny the field of view is compared with the slide, and how small the slide is compared with the plate: if I think there are 100 to 200 cells on the slide, it is probably too many. It takes time, but it is worth repeating until I get it right. I don't want to wait two weeks for a plate to grow only to find a solid mass of organisms covering it. It feels very counter-intuitive to plate from a sample that seems devoid of any living creature, but if I can find even one cell on the slide, there will be plenty on the plate. Over time I have got better at fighting the instinct to add more yeast before plating. I am not quite there yet, but one step at a time.
Tip
I mix the sample thoroughly. At these dilutions, good mixing breaks up cell clumps, which is important for plates with lone colonies.
Tip
Once I have what looks like a good number of cells per one or two loops, I don't make five plates the same way. I use different streaking techniques and increase the dilution from one plate to the next: for example, after plating from a good sample, I dilute further by adding water; if I started from a very dilute sample, I add one more loop of culture.
5 · Observe the plates and assess colonies
I start checking the plates from day 3, then every day or every other day. How fast a colony appears is a first hint of what it is. Although it does not tell much, I pay attention to colony morphology (size, shape, surface, edge, colour), and aim first to spot any undesirable or harmful bugs (rare). If the organisms I want are not there, or a plate is too crowded to find lone colonies, I adjust the dilution or the medium and start again.
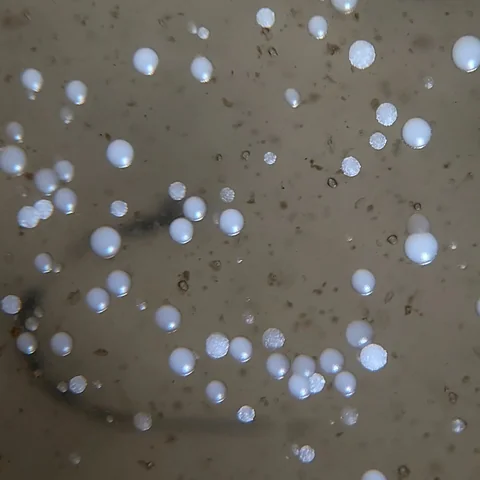 Brett colonies with different morphologies on one plate
Tip
I don't give up on a plate early. Slow organisms can take two weeks or more to show visible colonies. I note how long each type of colony took to appear: I need it again in step 8.
Tip
In my experience, Saccharomyces colonies are visible at about 3 to 5 days and Brett at 5 to 14 days, sometimes more; fast-growing bacteria on hopped plates may indicate hop tolerance. Brett colony morphology varies by strain: two related strains in one sample can grow quite differently on the same medium, and identical-looking colonies may have grown from different Brett strains. Many of the bacterial colonies I have seen were slightly translucent and milky.
Tip
When I see mould, I can usually save the plate by cutting it away, together with a portion of the agar around it, with a knife or spoon.
Photo to come
A plate with mould cut away.
Tip
I smell the plates. Brett ferments glucose to ethanol and acetic acid in the presence of oxygen, so a vinegar note on an aerobic plate does not by itself mean acetic acid bacteria. With bromocresol green in the medium, organisms that produce acid discolour the agar around them. With precursors such as p-coumaric or ferulic acid added, a 4-EP or 4-EG smell may indicate Brett.
6 · Pick lone colonies
I inspect the plates with a magnifying glass to identify lone colonies of the same morphology, well clear of their neighbours. I pick five to ten at a time, each into its own tube of sterile distilled water. I pay attention to everything else on the plate, especially if the colonies I am targeting are not the smallest ones. When picking big colonies it is easy to scoop up tiny colonies that are hard to see with the naked eye; not a massive problem, but a waste of time.
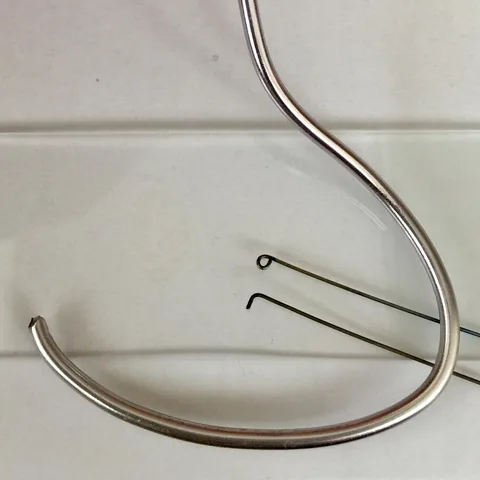 Plating and colony-picking tools
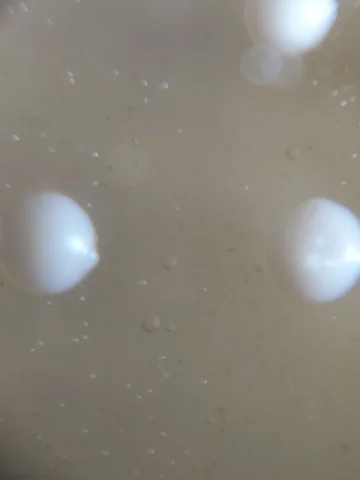 Size comparison: Saccharomyces colonies (large) and Brett colonies (tiny)
Photo to come
Picking a lone colony under the magnifying glass; the labelled sterile-water tubes.
Tip
Picking several colonies helps make sure genetic diversity isn't lost. Five to ten colonies would not normally be considered enough, but I am aiming for five individual tubes, which get combined once they are proven free of intruders. That increases the pool considerably.
Tip
Although it is extra work, I find it useful to also isolate or enrich the organisms I don't intend to keep. Knowing their morphology helps me recognise them later in samples that are not meant to contain them.
Tip
I use a small torch with the beam parallel to the agar surface: colonies, and differences in their morphology, are much easier to see. When I think I have spotted different organisms by the way they reflect the light or by their shade, I rotate the plate. More than once the difference turned out to be just the angle of, or the distance to, the light.
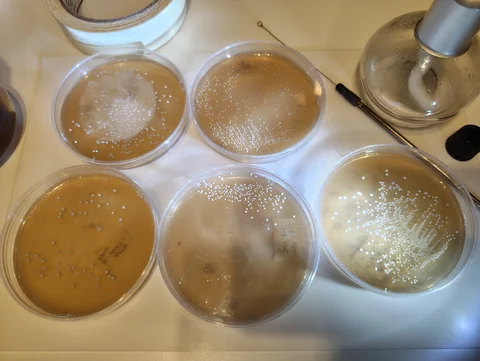 Looking at plates with the torch beam parallel to the agar surface
Tip
If the target organism grows fast, I prefer to wait long enough for the other organisms on the plate to grow before picking. Giving slow organisms the chance to grow lets me see them and avoid them.
Tip
If the target organism forms big colonies compared with the others on the plate, I look at the distribution: if the big colonies are surrounded by small ones, chances are the big colony has grown over small colonies.
Tip
If a plate is more crowded than I would like, or if I am picking big colonies, I scoop only a tiny bit from the top of the colony, to minimise the risk of picking up anything else. This does not eliminate the risk completely, since cells tend to stick to each other, especially bacteria.
7 · Microscope check of each pick
I inspect a sample from each tube thoroughly under the microscope and discard any tube that shows a mix of organisms. The aim is to end up with five tubes, each holding the organism I am trying to isolate. It is not possible to tell strains apart just by looking through a microscope, but in most cases it is possible to tell Brett from Saccharomyces, and it is always possible to single out bacteria.
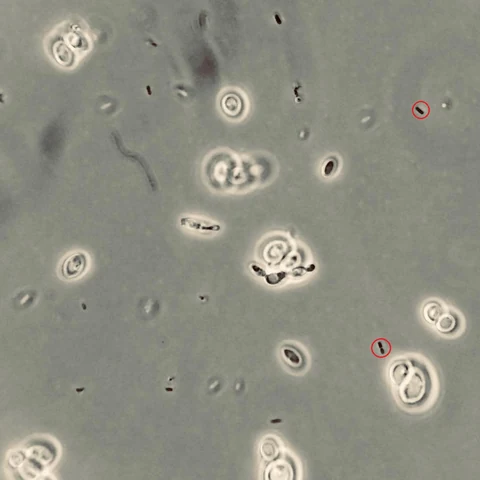 Contaminated Brett sample: bacteria circled in red · 1000x, phase contrast
Photo to come
A clean pick.
Tip
If I have cultured other organisms from the plate (step 6), I check them under the microscope and photograph them too. This helps me recognise them if they turn up in the clean samples I intend to take forward.
8 · Confirmation plating, and a repeat round
I plate every tube that passed the microscope check, then discard the tubes. I recommend repeating the round once more, especially if mixed colonies grew on the confirmation plates. I let the plates grow for at least as long as the slowest organism in the mixed sample took to appear, which is why I record those times in step 5.
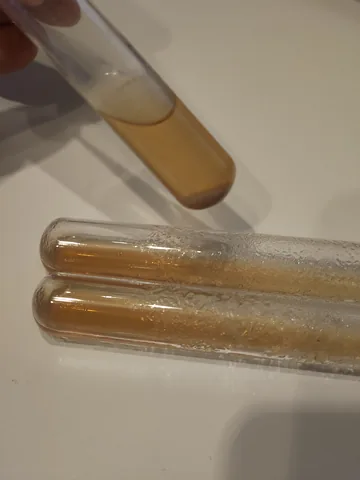 Isolated organism grown in clear wort, ready to be plated
In this example, both confirmation plates below were meant to hold only Brett; one got some Saccharomyces in, so another round followed.
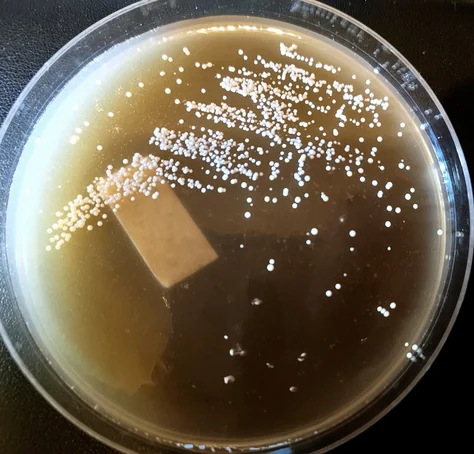 Confirmation plate: clean Brett · wort agar, ~21 °C
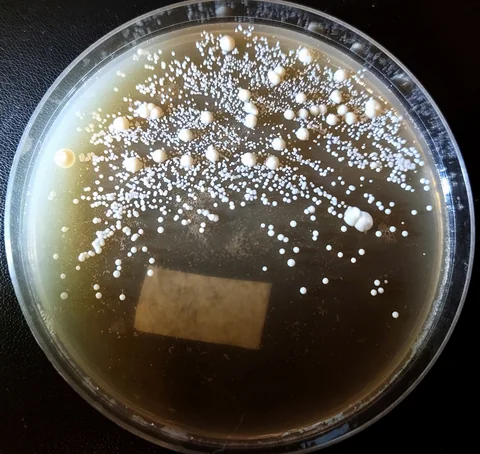 Confirmation plate: Brett with Saccharomyces contaminant (the larger colonies) · wort agar, ~21 °C
Tip
I plate each tube on two, sometimes three plates: it is not uncommon for mould to get in and take over a plate before the slowest organisms start to appear. If I don't feel like plating that much, I don't discard the test tubes: I add some sterile wort and keep them, making sure each tube can be traced to its plates.
Tip
On a repeat round, I make sure the sample I am drawing from is diluted enough to avoid a crowded plate.
Tip
Colonies of one organism can look different, both on the plate and under the microscope. This is especially true of Brett: I usually separate them and carry on as if they were different strains, and recombine them if I find no discernible differences later on. If the differences are in what appear to be Saccharomyces colonies, I always keep them separate, as one may be a bottling yeast.
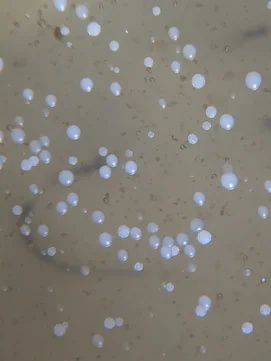 Shiny and dull colonies of the same Brett · wort agar, ~21 °C
A deviation from the process: cultivating different colonies to assess their characteristics before carrying on
9 · Clear-wort tubes, traced
From the clean plates, I pick 10 to 20 colonies into test tubes of unhopped clear wort, aiming for at least five tubes. I label each tube, trace it to the plate it came from, and cultivate the tubes for 2+ weeks.
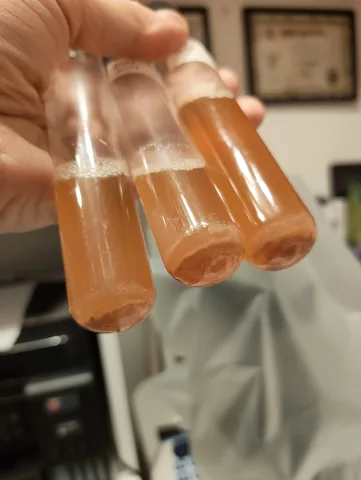 Brett tubes in clear wort
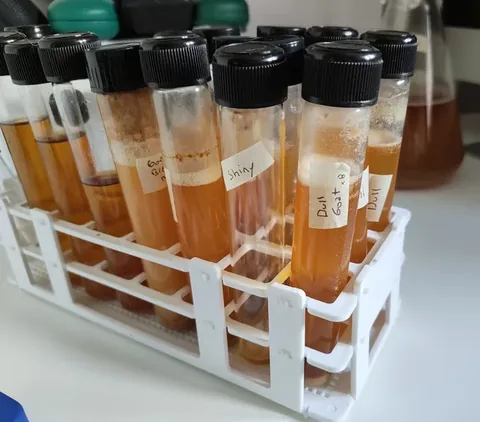 Several tubes growing confirmed samples
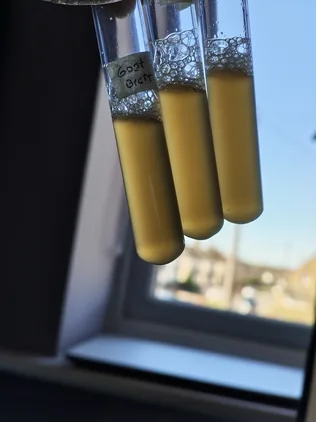 Confirmed isolate growing in clear wort
Tip
Since putting this wiki together, I have started using one label scheme on plates, tubes
and slants, e.g. journey ID, round, plate and tube (016-R3-P2-T4), so any culture can be
traced back to the plate it came from, with enough documentation recorded to consult.
Tip
By this stage the plates are already 2+ weeks old. To keep them viable, I tape the lids to the bases so they cannot fall off, stack the plates in a plastic bag and store them in the fridge.
10 · Full-slide check at 1000x
I examine each tube carefully under the microscope, scanning one full slide at 1000x. If undesirable bugs turn up, I correlate what I see with the plate the tube came from and go back to confirmation plating. If I have followed the process carefully, the chance of finding anything other than a clean sample at this stage is low. Tracing each tube to its plate lets me check that what I see in both is consistent. I keep two or three clean tubes per organism.
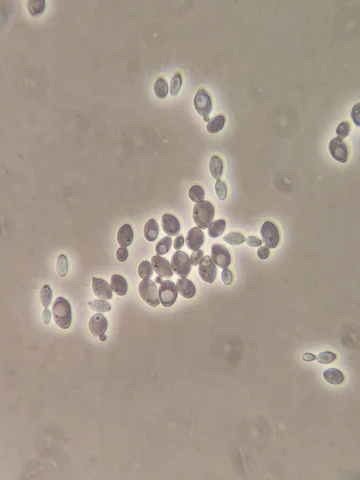 Clean Brett tube · 1000x oil immersion, phase contrast, no stain
Tip
I scan the whole slide systematically, row by row. A contaminant at low numbers only shows up in a few fields, and a quick look at the centre will miss it.
11 · Banking on slants
I prefer slants that are clear and uniform; the best way I have found is to pressure-cook the wort for ~10 min and decant it off the proteins before filling the tubes. I use 16 x 100 mm screw-cap borosilicate test tubes, each taking:
| Ingredient | Amount per tube |
|---|---|
| Wort | 3.0 mL |
| Agar | 0.09 g |
The filled tubes go in the pressure cooker for 15 min. I then set them to cool slightly inclined, so the agar covers the length of the tube without reaching the cap; in these tubes, this amount gives a perfect slant with the maximum surface area. The mineral oil is sterilised in a 50 mL test tube in the pressure cooker. Once the slants are inoculated, I let the organisms grow until there is a clearly visible layer, then fill the tubes with sterile mineral oil, label them (including the date) and store them in the fridge. I typically make two slants per organism; any more would take space I don't have. Each slant goes in the bank inventory.
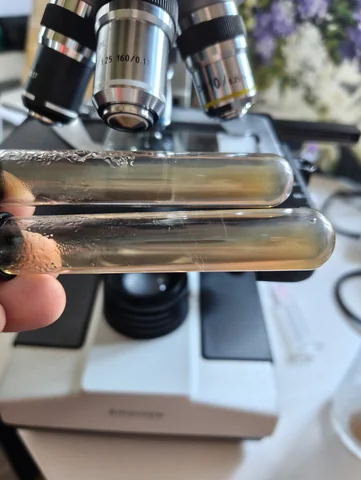 Clear wort slants
Photo to come
Slants setting at an angle; the bank storage.
Tip
I add the wort and agar directly into each tube: I measure the wort with a blunt-needle syringe, and the agar with a calibrated scoop made from a syringe cap.
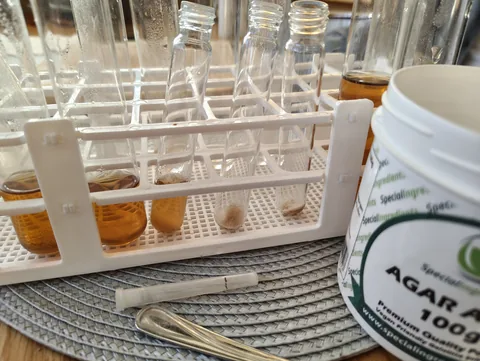 Single-tube agar measure: a marked syringe cap
Tip
I don't use an inoculation loop to transfer the organism to the slant. Instead, I pour a few drops from one of the sample tubes onto the slant and then decant the excess. I find this much less fiddly than a loop, and the chance of letting something in is much lower.
Tip
While the slants incubate, I store them cap down, so any excess liquid collects by the cap and I can get rid of it when it is time to fill the tubes with oil.
12 · Step up and brew mini-beers
This step can run before banking, but at this stage I rarely want to wait to bank the organisms, so I follow the order on this page. I step up the cultures from the clear-wort tubes used for banking, in sterile wort, until there is enough thick slurry to pitch into 200 mL of DME wort at 1.030 to 1.050, fermented in a 250 mL Erlenmeyer flask under an airlock: effectively a mini-beer.
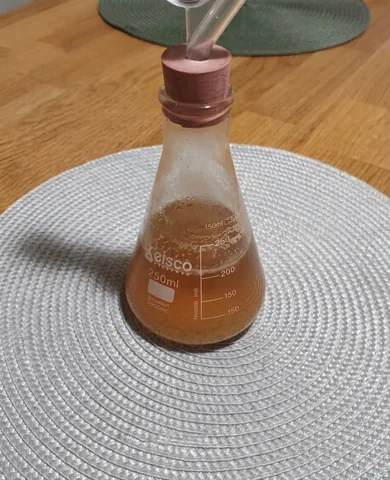 Mini-beer fermenting in a 250 mL Erlenmeyer flask
Photo to come
Step-up vessels; several mini-beers fermenting side by side.
Tip
I record original and final gravities, and as many sensory parameters as I can. They are always useful.
Tip
Demijohn bungs fit 250 mL Erlenmeyer flasks. My rubber bungs are not completely odourless: not a problem on a 5 L demijohn, but on a 200 mL sample any smell gets in the way, especially when I briefly remove the bung to smell how the beer is fermenting. Lining the bung with a couple of layers of cling film helps.
13 · Assess the mini-beers
I assess each mini-beer for aroma and flavour. At this stage I am only looking for the rough characteristics of the organism and its performance: is it POF+, does it ferment dry, are there esters, 4-EP, 4-EG, and so on. The mini-beers may ferment for 2 to 8 weeks, depending on what is going on. If an experiment does not give the result I expect, I use the slurry to make more mini-beers.
Photo to come
Finished mini-beers in the glass.
Tip
When an organism does not deliver what the source beer promised, the cause may be the process rather than the bug, so I try altering the wort composition and the fermentation parameters.
Tip
I still use aseptic technique when sampling the mini-beers. This lets me fill a test tube with slurry and keep it in the fridge without worrying that I have introduced another critter. I typically use the stored slurry to spike a carboy, or grow it up to a pitchable amount.
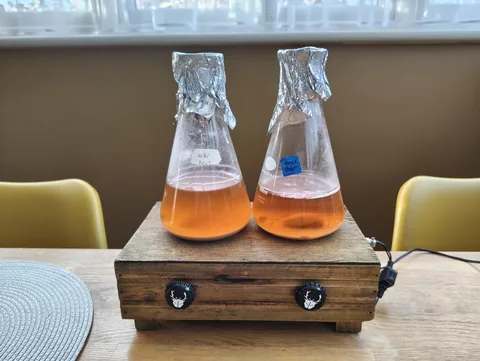 Growing isolate slurry to keep for spiking carboys
Tip
I do quick microscope checks even on the mini-beers and on the slurries kept in the fridge. Not a full scan at 1000x: a quick scan at 400x (no oil needed) easily confirms the mini-beer or slurry has not gone in the wrong direction.
14 · Using the slants
Slants are my backups, and my storage for organisms I don't plan to use in the short term. When I grow organisms from a slant, I find that working from a tiny amount of cells taken from it takes far too long. Instead I use the whole slant, sometimes two. I pour off the mineral oil and let the tube drain upside down in a small cup. I then fill the tube almost to the top with sterile wort and let it sit for a while, shaking it periodically. This gives what feels like 100 times the cells I would get from a small scraping, enough to pitch into a 250 mL starter in one or two steps. I usually prepare and inoculate a new slant straight after the first step.
Photo to come
A slant draining, and a slant revived in wort.
Tip
Most of the time the colonies are firmly attached to the agar and don't come loose in the wort. I use a long inoculation loop to dislodge the stubborn ones.
Documentation
Tip
I recommend defining a documentation strategy before starting any of this: decide what notes to take and when, and how to record them (pen and paper, digital, software), set up templates, and try to stick to it. What I record: colony and cell morphology, plate smells, dates, media, temperatures and days, and the mini-beer notes.
Tip
When photographing plates, I make sure there is a label in the frame: I have so many old photos I have no idea about. Microscope photos are harder, as it is not possible to label them, so I have started to name or identify each file right after taking it.
Kit notes
Tip
I have 16x100mm and 25x150mm test tubes. I periodically sterilize them using a pressure cooker and when I do, I fill some of them with 1.030 wort and some with some distilled water, this way I always have wort to grow dregs or water to dilute ready in case needed. If I am bothered to run the pressure cooker twice, I would ensure the wort tubes are clear without protein sediments.
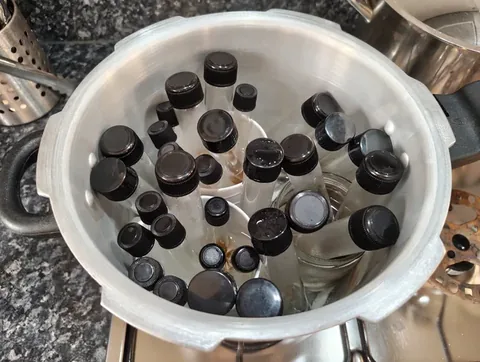 Test tubes in the pressure cooker, ready to sterilise
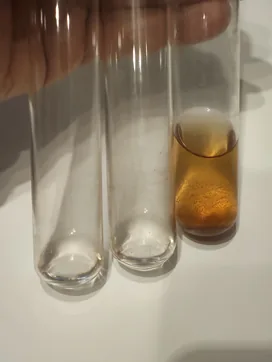 Sterile water and wort tubes, ready to use
Tip
I use a small budget methylated-spirit lamp, and the spirit evaporates quite quickly when the lamp is not in use. I keep a small amount of spirit in a little dispenser bottle and top up as needed; this also means I don't keep large quantities of flammables in the house. I have more of these bottles for isopropyl alcohol and bromocresol green.
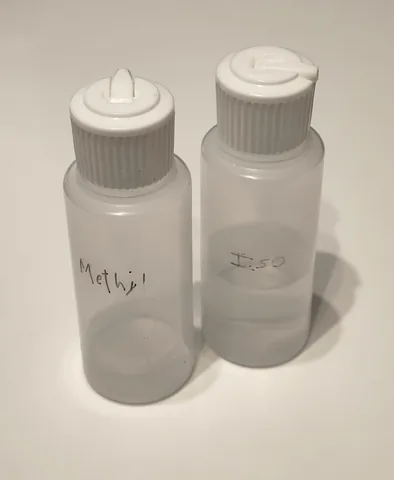 Little dispenser bottles for alcohol
Tip
I have an AmScope T390 with the phase-contrast kit, which comes with separate condensers. Phase-contrast kits were at the limit of my budget when I bought mine, but I regret not buying the higher-tier one with a rotating turret. Changing the condenser is just too much trouble, so I leave the 100x condenser fitted all the time and reluctantly accept poorer phase contrast at 400x. With the 10x objective, this condenser gives a dark-field-like view, which is fun.
Tip
I bought a trinocular microscope because I knew I would be taking photos. For a while I had an adaptor for my phone, but unless there is a spare phone that can stay fitted and be charged in place, it is not very practical. I then bought a dedicated camera, and did not like it: these cameras have sensors smaller than the eyepiece field, so the result is like a massive digital zoom, when I usually want a picture that mimics what I see through the eyepiece. I now take photos by simply holding a camera in front of the eyepiece, and it works just as well for what I do.
Tip
Glasses wearers need different eyepieces. Turned around, a WF10x/18 mm eyepiece happens to make the perfect magnifying glass for looking at plates through the lid: its focal length matches the height of a covered plate. A happy coincidence.